The first part of the user manual discussed how to prepare an agenda for your meeting. Now we’ll see how we can use the agenda to turn it into meeting minutes using AgreeDo.
Important: There’s no difference in AgreeDo between an agenda and meeting minutes. All this happens on the same page. This might sound strange, but this offers various advantages:
- No extra work when turning the agenda into meeting minutes
- The structure of your agenda should match the meeting minutes anyway.
- It’s more efficient to add the contents to the agenda while discussing the points
- The structure of a meeting usually influences its follow-up meetings.
The agenda turns into meeting minutes by adding the results and discussion points. Ideally, this happens during the meeting while all participants are watching. This avoids any misunderstandings.
Table of Contents
Step 2: Running a Meeting
This chapter covers how to use AgreeDo to prepare your meeting minutes. As stated before, this should happen during the meeting. AgreeDo helps you to do this efficiently by offering keyboard shortcuts for all important actions.
Using the Timer
On the upper right of the agenda, you’ll find the “Start Meeting” button:

This will start a timer counting the elapsed time during a meeting. It also shows the remaining time, so that all participants can see how much time is left.
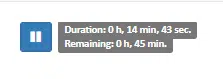
There’s also a pause button in case you need a break :-).
Capturing important contents and tasks
As discussed in the previous chapter, there are different item types.
There are keyboard shortcuts to convert the current line into any item type. Use Alt+i to convert the current line into an info item, Alt+t to change it into a task, Alt+d to change it into a decision, and Alt+h to change it into a topic (“heading”).
To navigate between the lines, you can use your cursor keys to move up and down. The current item is always highlighted with a blue frame.
To move an item within the agenda, use the arrow buttons in the menu bar.
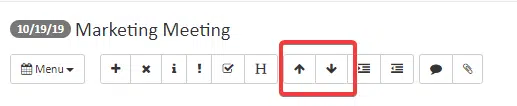
Alternatively, you can use the keyboard shortcuts Alt+”Cursor Up” and Alt+”Cursor Down” to move the current item.
There’s a third option: you can drag an item with your mouse by clicking and holding on the icon of the item.
Note: When using the mouse to drag an item, it will also move all items in the hierarchy blow. This is very helpful when moving a whole topic.
You can also select multiple items to move them together. Just hold down the Shift key, while selecting multiple lines with your cursor keys.
Keeping Your Meeting Minutes Concise by Adding Comments
Keep your agenda and meeting minutes concise by just adding important information. But what should you do when there’s more to say? Of course, you can just use the indention feature and add multiple sub-items. But there’s also a additional option:
You may also use the comment feature. Later, we’ll see that comments also can be used for different purposes. Comments can be added to every item type. Just click the balloon button in the toolbar:
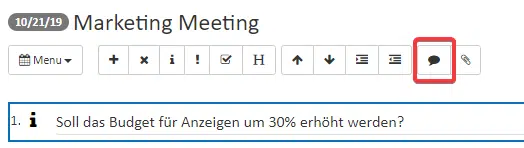
Of course, there’s also a keyboard shortcut: Alt+c
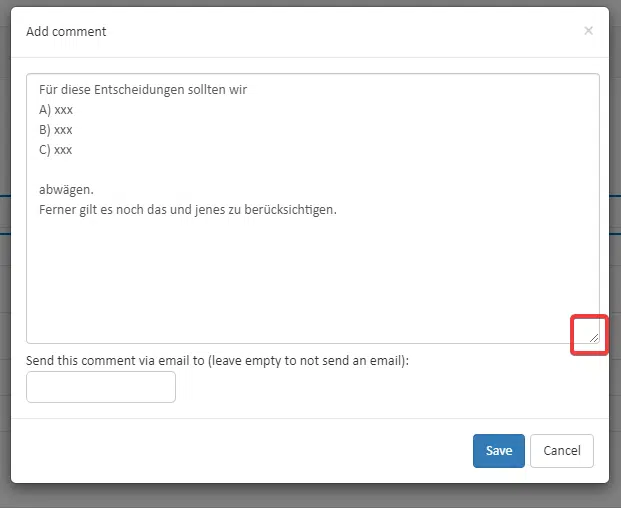
This will open the comment dialog as shown below, where you can enter your comment:
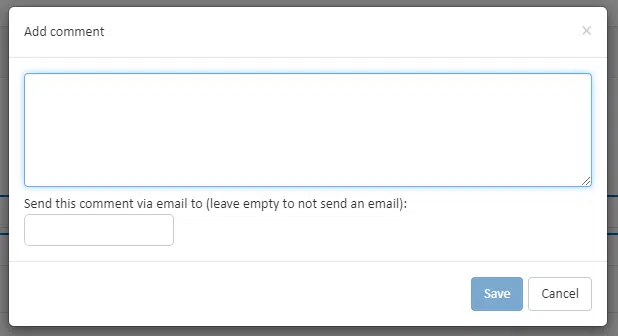
The dialog allows for a longer text. Just use the handle on the lower right corner to increase the size of the input area (this option may only be available on some browsers like chrome, firefox, etc.):
Clicking save, the comment dialog will be closed. An indicator below the item now shows that there’s a comment.

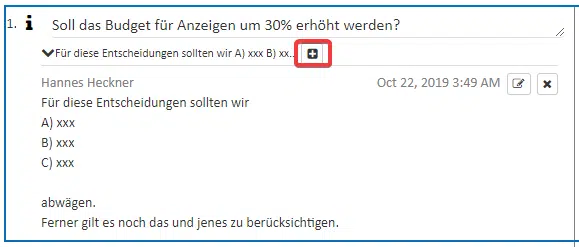
You can use the “>” button to expand the comment:
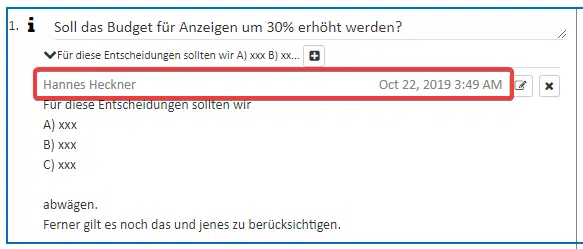
The fully expanded comment also shows its author and date when the comment was added.
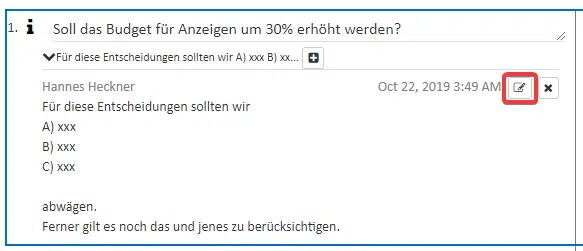
To edit a comment, click on the the button as highlighted below.
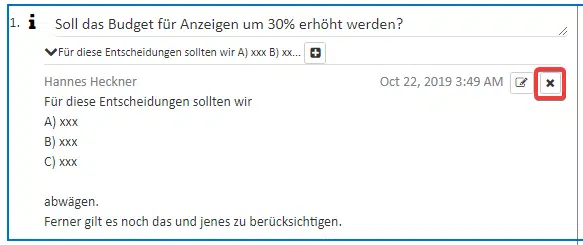
to remove a comment click on the “X” button as shown below.
Using the “+” button, you can add another comment to continue the discussion.
To hide the comments, use the button as shown below.
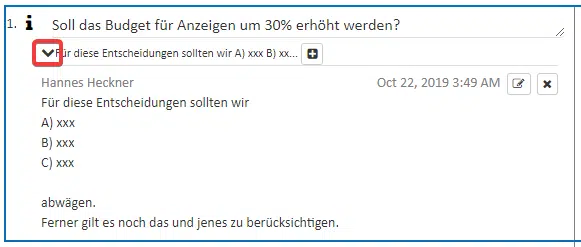
This will collapse the comments. Only the latest one still be visible:

Use may the comment feature for detailed discussions on one single item.
Note: Encourage the attendees of your meeting to add their comments on the items to be discussed.
Adding Files
Like with comments, you can add files to every item. Use paper-clip icon to add files to the currently selected item:

Again, there’s a keyboard shortcut: Alt+f
Note: When using AgreeDo on your smartphone, you can use the files feature to instantly add photos to your items. If you use flip charts during the meetings you may add the photos of them later to your AgreeDo meeting minutes.
There’s going to be another meeting…
If you have taken the minutes during the meeting, then have no additional meeting minutes work afterwards. All users invited to the meeting have already access to the minutes. There’s no need to send the minutes around, because the attendees already received the link to the meeting with their invitation.
Of course, there will be work left after a meeting. What about the tasks assigned during the meeting? What about followup-meetings? The third part of the manual will show you the features of AgreeDo which are helpful after a meeting:
- Tracking tasks
- Preparing a follow-up meeting
- Searching for meetings’ contents.